Showing posts with label gluten free. Show all posts

Tuesday, June 14, 2011

I discovered Larabars recently while looking for some help to get through my workouts without feeling weak afterwards. I had tried protein shakes but found them too chalky. Boost is good but it's also expensive. Larabars were like a godsend because they were gluten free, rich in protein without being full of crap and delicious. I could eat one (or two) every day.. if I could afford it.

Looking at the ingredients on the Peanut Butter bars (dates, peanuts, salt) I realized that I could probably come up with my own version. A quick search on google confirmed that homemade Larabars are easy to make & just as good as their name brand counterpart.
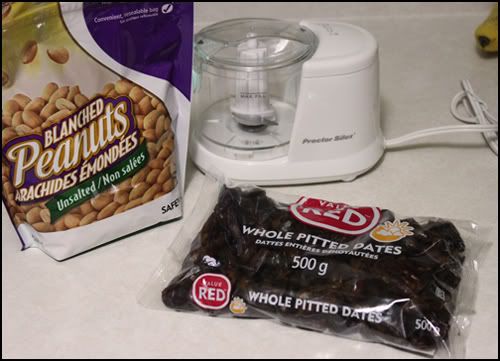
I picked up a package of "red value" brand pitted dates today for $2.99 and a bag of unsalted peanuts for $3.50 at my local Safeway. I wasn't sure if these were the right kind of dates - they had larger unpitted ones for $15/box but these ones were nice and sticky and worked great.

I used about 3/4 C of dates (loosely packed) and 1/4 cup of peanuts along with a dash of salt and a splash of vanilla for each batch. This is the kind of thing that can be made to preference, more dates for sweeter bars and more peanuts for saltier. Some recipes I found called for cocoa powder for a fudge version.

I made two batches, the first one I made by mincing the dates first and then adding all the other ingredients and the second batch I tried putting all the ingredients in at once. I recommend doing it the first way as the peanuts were not chopped as finely in the "all at once" method. I shaped them into bars with saran wrap and put them in the fridge.

I made 5 bars with just under half the bag of dates and barely any of the peanuts for a total of $2. That's just twenty cents a bar. Now I can indulge in two a day, guilt free.
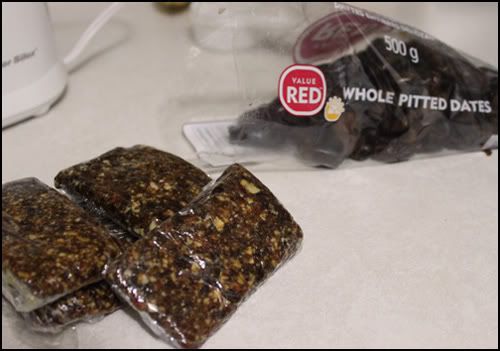


Let me know if you try making your own Larabars & any variations you make. I'd like to try a version with cashews, and maybe one with shredded coconut.

Monday, May 09, 2011


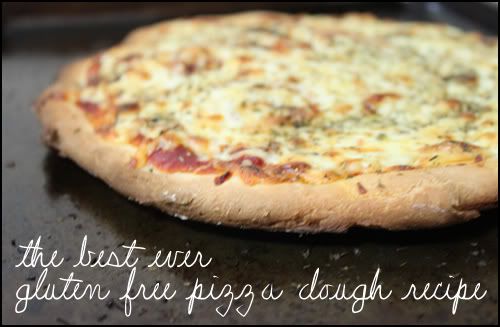
The hardest part about going gluten free was losing pizza. It had been my favourite food since I was a kid and something we ate at least twice a month. (Or week, on occasion...)

Thankfully pizza places are starting to offer GF delivery and there are lots of options for buying frozen pizza crusts and mixes these days. It's hit or miss though, some of it tastes like cardboard and many of them are full of weird preservatives. I've bought bread with a two year expiration date.. that's just wrong.

I've adapted this recipe for Pizza Dough from the Betty Crocker New Edition Cook Book. You can use any gluten free flour, either your own mix, straight rice flour or a bread mix. I use Celimix White Bread Mix as my regular all purpose flour. This recipe will make two round pizzas, I "half double" it, to make 3 pizzas. One big one for my boyfriend and one small one for me.

Pizza Crust:

2 1/2 to 3 Cups Gluten Free Flour
1 tbsp sugar
1/2 tsp salt
1 package quick or regular yeast (equivalent to 2 1/4 tsp)
1 tsp guar or xanthan gum
3 tbsp olive oil
1 cup very warm water

Preheat your oven to 375.
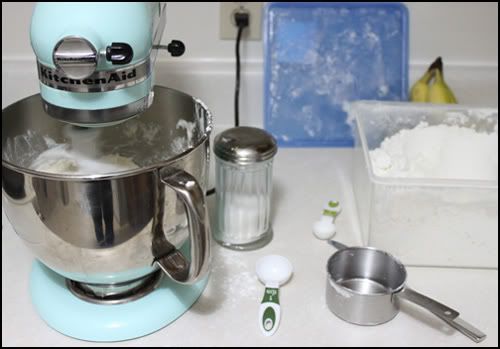
Mix 1 Cup of the flour, sugar, salt, yeast & guar/xanthan gum. Add oil and warm water. Beat with mixer on medium for 3 minutes, scraping frequently. Use your batter beater, not the dough beater. Stir in enough remaining flour until dough is soft and leaves side of bowl. I always mix up these steps, either I add all the flour at once or I don't beat it long enough, etc. It's very forgiving, so don't worry if you dump in all 3 c of flour at once accidentally. (I've done that more than once.)


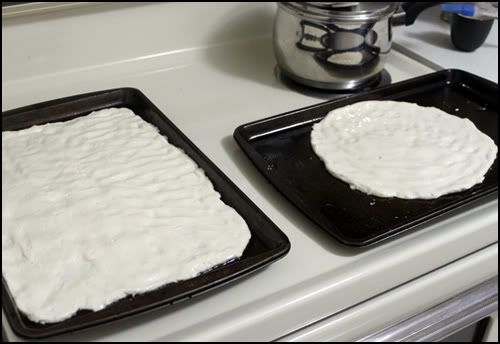
Divide dough and scoop it out onto a well greased baking sheet. Dust your hands with your GF flour and press it into shape with your fingers. I use a bit of oil on my fingers too. I make my little pizza into a circle and Randys double pizza fills up the whole baking sheet. I press these fairly thin because they will rise up a bit in the oven. Brush a bit of oil around the edges and place the pizzas in the oven for approx. 8- 12 minutes. You will know it's ready for toppings when the dough looks dry and starts to crack.


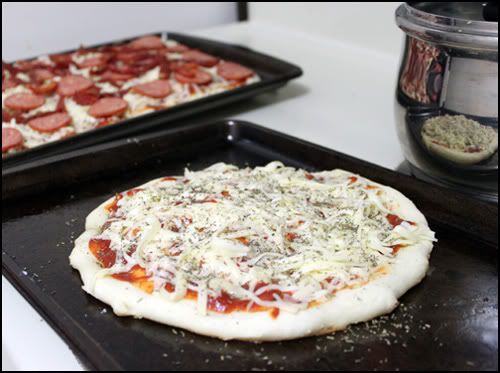
Load up your partially baked crusts with toppings. I like cheese and basil and Randy likes cheese, pepperoni and sundried tomatoes. You can pretty much put anything on these pizzas, but if the topping is wet, like mushrooms, it's good to put it on during the last 5 minutes of baking.


Bake for an additional 10 - 15 minutes. I like to turn the broiler on for the last few minutes to brown up the cheese. These make a nice crispy crust that's got the right amount of chewiness to it - that's something that is usually missing from gluten free baked goods.


Enjoy!

Tuesday, March 01, 2011

The Best Gluten Free Banana Muffins (They're Vegan Too!)

I was really tempted to call my post "Tasty Tuesday" for some strange reason. What is it about blogging that makes you want to turn everything into an alliteration? I wasn't able to come up with anything catchy though, so I'll just call this section "Gluten Free Recipes" for now. (You'd never know I make a living based on my creativity...)

I've been gluten free for almost two years now and in that time I think I've tried every flour created and every brand of Gluten Free/Celiac Friendly processed food. Some of it is really good.. and some of it tastes like wet dog.

We don't have many GF products in Canada - no Betty Crocker mixes, no Bisquick, no Rice Chex. It's a lonely celiac world up here that involves a lot of baking from scratch. My saving grace has been Celimix. On it's own it's pretty bland, but used as a flour base it's great. Previously I made my own flour mixture but the Celimix bread mix is so convenient and delivers better results. A 2 kg bag sells for just under $12 at my local Safeway. You can find it in the gluten free section if you're lucky enough to have one, or in the regular flour aisle.


These muffins are so good that even my not-giving-up-gluten-for-anything boyfriend loves them. It's a recipe I've adapted from my trusty Betty Crocker cookbook to be gluten free and vegan. You can use regular cows milk instead and 1 egg in place of the flax mixture if you prefer.

The Best Gluten Free Banana Muffins (They're Vegan Too!)

Prep: 10 mins Bake: 25 Mins
12 Regular Muffins

1 C mashed, ripe bananas (2 medium)
1/4 sunflour oil (or your preferred oil)
1/3 C soy milk or almond milk (or 1/3 C cows milk for nonvegan)
1 tbsp flax meal mixed with 3 tbsp warm water for egg substitute (or 1 egg for nonvegan)
2 C flour mixture minus two tablespoons (I measure a full C then dump out about 1 tbsp. GF flour mixes use slightly less than the equivalent white flour measurement.)
1 tsp guar gum (or xanthan gum)
1/2 C packed brown sugar
2 tsp baking powder
1/4 tsp salt

1. Mix flax egg substitute in separate dish. Set aside.
2. Preheat oven to 400F. Grease 12 medium muffin cups. Don't use paper liners for these guys, they are too sticky.
3. In large bowl mix bananas, milk, oil and flax egg with fork until well mixed.
4. Add flour, guar gum, brown sugar, baking powder and salt. Stir until well moistened. Add more milk if neccessary. I usually have to add one or two more tbsp of milk depending on how much banana I've added. Mixture should be thick.
5. Divide batter evenly among muffin cups. Bake for 20 - 25 minutes. Let stand and remove to wire rack.

Best served warm and kept in the freezer. Microwave from frozen about 30 seconds before serving.

Make a cup of tea, get out a book and enjoy a little treat.

Wednesday, July 22, 2009

The Gluten Free Flour Mix that Saved My Life (or at least my sanity)

Original Photo By DeathByBokeh


The most intimidating part of going Gluten Free has been the flours. The first few times I tried to navigate Gluten Free recipes and websites I actually cried because it was so confusing and I had no idea how I was ever going to eat again. All of a sudden a simple pancake or baking powder biscuit recipe had 14 ingredients, most of which I hadn't even heard of before. Sorghum Flour? Amaranth Flour? Quinoa, Teff, Millet? What??

After several months and some experimentation I discovered Gluten Free Cooking School and Mary Frances' amazing All Purpose GF Flour Mix. Since discovering this mix being GF has been so much easier AND cheaper - this is a low cost mix with easy to find flours.

All Purpose Gluten Free Flour Mix:

3 Parts Brown Rice Flour
3 Parts Corn Starch
2 Parts Soy Flour
1 Part Tapioca Flour

The original recipe calls for Masa Harina flour instead of Tapioca but I wasn't able to find it anywhere so I sub'd Tapioca since I had it on hand and it turned out great. If you don't eat Soy you can sub Sorghum Flour instead.

To make things simple I use cups for parts, so 3 cups Brown Rice Flour, etc. I don't mess around with a bowl, I pour the flour right into a tall tupperwear container and give it a really good shake until the flour is uniform with no streaks. (This is a good way to get out your frustrations about having to be gluten free, shake shake shake, swear swear swear.. damn you flour!) I keep it stored in the fridge.

So far I've made bread, biscuits, pancakes, muffins and flatbread with this mix and it's worked amazingly well every time. I've used it in Gluten Free recipes in place of the crazy list of called for flours, just add up how many cups of flour in total is used in the recipe and use the same amount of this mix instead. If you want to sub it into a nonGF recipe you just need to add 1 tsp of Xanthan or Guar Gum.

I'll include some of my favourite recipes using this mix over the next little while - it really makes the best biscuits I've ever had, with or without gluten! I have a butterscotch brownie recipe I want to try adapting to GF with this mix, my first foray into desserts. It's a mild enough flour that I think it would work equally well for breads and cakes.

If anyone tries this mix I would love to hear about your results and what you made with it.

Monday, April 06, 2009

Delicious Gluten Free Biscuits!

I've been Gluten Free for one week today & I'm feeling great! I've only had a few moments of utter frustration trying to prepare dinner or find ingredients. I don't recommend trying to make GF pizza dough while someone is eating a delivery pizza right in front of you as your first baking experiment. Otherwise I can't complain too much.


This morning I made my first GF biscuits and I'm happily surprised with how good they are. I followed the recipe exactly, except I substituted flax seed meal for the xanthan gum. I was a bit worried that I would have hockey pucks or have to throw them out but they were light and fluffy and had a really nice slightly sweet taste. I ate mine fresh from the oven with peanut butter. Yum.

The recipe is from the Canada/Kiwi Bed and Breakfast Site.

Gluten-Free Biscuits

1/4 cup brown rice flour
1/2 cup white rice flour
1/4 cup corn starch (or potato starch)
1/2 cup tapioca flour
2 teaspoons baking powder
1 teaspoon xanthan gum
1/2 teaspoon salt
1 tablespoon sugar
2 eggs
1/3 cup vegetable oil (avoid olive oil)
1/2 cup milk
1/2 cup grated cheese (optional, and if using cheddar cheese, use white cheddar, as other cheddars are not necessarily GF)

Mix all dry ingredients together well. Add other ingredients. Mix well. Drop on lightly greased cookie sheet. Bake in 400 degree F oven for 10 to 12 minutes. Makes 6 large or 12 small biscuits.

If you want to substitute flax seed meal use equal amounts (1 teaspoon in this recipe) and let the entire mixture stand for 10-20 minutes before you scoop onto the cookie sheet.